


Table of contents
- 1.🌟 Introduction 🌟
- 2. 💾 What is Git, and why is it important?
- 3. 🔀 Difference between Main Branch and Master Branch?
- 4. 🤝 Difference between Git and GitHub?
- 5. 🚀 How do you create a new repository on GitHub?
- 6. 📂 Difference between a local and a remote repository?
- 7. 🔗 How to connect local to remote?
- 8. 📋 Tasks 1:
- 9. 📋 Task 2:
- 10. Conclusion
1.🌟 Introduction 🌟
In our hands-on exercise, we’ll take practical steps to connect our local repository to GitHub. Get ready to witness the magic as we create a fresh file, infuse it with content, and effortlessly push our local commits to the remote repository. 🚀 Our journey aims to arm you with the vital Git knowledge needed to supercharge your development workflow and foster seamless collaboration in the ever-evolving tech landscape! 💻🤝
2. 💾 What is Git, and why is it important?
Welcome to the fascinating world of version control systems like Git, where we explore the intriguing distinction between the “Main” branch and the “Master” branch. These branches differ mainly in their names and historical context.
In the past, the “Master” branch held a prominent role as the default branch for main development work. However, in recent times, the industry has been actively promoting more inclusive language practices. As a result, many platforms and communities have made a shift towards using the term “Main” instead of “Master.”
Despite their differing names, both the “Main” and “Master” branches serve the same fundamental purpose. They act as primary branches where developers collaborate and maintain the latest stable code. The choice of branch name now rests on the preferences and conventions of each development team or organization.
As the technology landscape evolves, so do our practices. The adoption of “Main” as the default branch name reflects the industry’s commendable efforts to embrace diversity and inclusivity in all aspects of software development. 🌐🔄 Let’s continue to move forward together in fostering a more equitable and collaborative coding environment! 💻🤝
3. 🔀 Difference between Main Branch and Master Branch?
The intriguing distinction between the “Main” branch and the “Master” branch. These branches differ mainly in their names and historical context.
In the past, the “Master” branch held a prominent role as the default branch for main development work. However, in recent times, the industry has been actively promoting more inclusive language practices. As a result, many platforms and communities have made a shift towards using the term “Main” instead of “Master.”
Despite their differing names, both the “Main” and “Master” branches serve the same fundamental purpose. They act as primary branches where developers collaborate and maintain the latest stable code. The choice of branch name now rests on the preferences and conventions of each development team or organization.
As the technology landscape evolves, so do our practices. The adoption of “Main” as the default branch name reflects the industry’s commendable efforts to embrace diversity and inclusivity in all aspects of software development. 🌐🔄 Let’s continue to move forward together in fostering a more equitable and collaborative coding environment! 💻🤝
4. 🤝 Difference between Git and GitHub?
Let’s explore the differences between Git and GitHub in simple terms:
Git 🌐: Git is a tool that acts as a time machine for developers. It allows them to keep track of changes made to their code as they work on a project. Think of it like saving different versions of a story at various stages. With Git, developers can create snapshots of their code at different points in time, making it easy to revert to previous versions if needed. Importantly, Git operates on your local computer and doesn’t require an internet connection.
GitHub 🐙: GitHub, on the other hand, is like a collaborative platform for sharing and working on your story with friends. Imagine a cool website where you can upload your story and invite others to read, edit, and add their own parts to it. GitHub uses the magic of Git to store your code and make it accessible online. Rather than keeping your code confined to your computer, GitHub allows you to save it in a central repository that others can access and contribute to. It’s like having a virtual writing club where everyone can join in and work together on the story.
5. 🚀 How do you create a new repository on GitHub?
Let’s get started by creating a new repository on GitHub, where we’ll keep and organize our code. Follow these simple steps:
Open your web browser and visit github.com.
Log in to your GitHub account.
On the GitHub homepage, click the “+” button at the top-right corner, then select “New repository” from the menu.

4. Give your repository a meaningful name.
5. You can also add a description to give more details about your repository.
6. Choose whether you want the repository to be public or private, depending on your needs.

6. 📂 Difference between a local and a remote repository?
Local Repository 🏠: A local repository is a self-contained copy of your project that resides on your local computer. It holds all the files, code, and version history related to your project. As you work on your project, you can make changes to the files, and Git will track these changes, allowing you to create snapshots (commits) at different points in time. This enables you to revert to previous versions if necessary and review the entire history of your project.
Remote Repository 🌐: A remote repository is a duplicate of your project stored on a server or an online platform such as GitHub, GitLab, or Bitbucket. Its purpose is to serve as a centralized location for your project, facilitating collaboration and code sharing with others. When you want to collaborate with a team or share your code, you push your local changes to the remote repository. This action synchronizes your local changes with the remote version, enabling others to see and access your modifications. Remote repositories are essential for team collaboration and provide a secure and central storage location for the project’s codebase.
7. 🔗 How to connect local to remote?
To link your local repository with a remote repository on GitHub, adhere to the following steps:
Create a new repository on GitHub, as described earlier.
On your local computer, locate the directory that houses your Git repository using either the command line or a Git client.
Integrate the URL of the remote repository into your local repository by executing the command:
git remote add origin <remote_repository_url>
Replace <remote_repository_url> with the URL of your remote repository on GitHub.
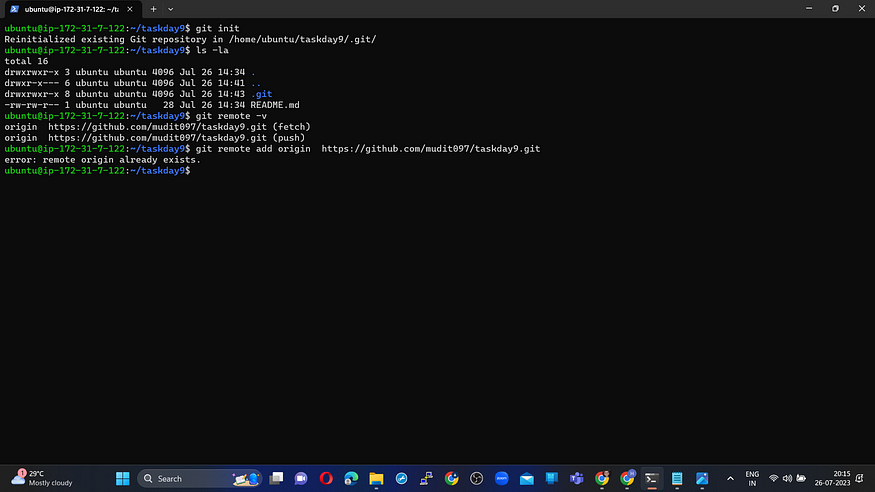
Verify the connection between your local and remote repositories using the command:
git remote -v
This will display the remote repository URL associated with your local repository.
8. 📋 Tasks 1:
8.1. Set your username and email address
Setting your username and email address in Git is essential for identifying you as the author of commits and contributions in your projects. This information helps Git keep track of who made changes to the code. 👤📧
To set your username and email address, you need to use the following Git commands in the command line or Git client:
git config --global user.name "Your Name"
git config --global user.email "your@email.com"


Replace “Your Name” with your actual name and “your@email.com” with your email address. The --global flag ensures that these settings are applied globally to all your Git repositories on the computer. 🌐🔧
By providing your username and email address, Git can accurately attribute your contributions, making it easier for other developers to recognize your work in collaborative projects. 🚀🤝
9. 📋 Task 2:
9.1. Create a repository named “taskday9” on GitHub.
Go to the GitHub website and sign in to your account.
Use the instructions provided earlier to make a new repository called “taskday9” on GitHub.

9.2. Connect your local repository to the repository on GitHub.
Go to the folder on your computer where you want to create the local repository.
🚀 Start a new Git repository by running the command:
git init
💻 Include the remote repository’s URL in your local repository with the command:
git remote add origin <remote_repository_url>
🔗 Replace <remote_repository_url> with the URL of your "Devops" repository on GitHub.
✅ To ensure that your local and remote repositories are connected, check the remote repository’s URL with:
git remote -v
👀 This command should display the URL of the remote repository linked to your local repository.
9.3. Create a new file in taskday9/Git/Day-02.txt & add some content to it.
In your local repository, make a new file called “Day-02.txt” inside the “taskday9/Git” folder. 📝
Include some content in the file, like this: 📄
Welcome to Day 9 of 90 Days For DevOps

9.4. Push your local commits to the repository on GitHub.
🔍 Use the command “git status” to see the changes you made. It will show the modified files.

➕ Use the command “git add” followed by the file names to prepare the tracking changes. For example: “git add filename.txt” or “git add .” to track all changes. Now check the status and our file is now tracked.

💼 Use the command “git commit” to save the changes with a meaningful message describing the modifications. For example, git commit -m ‘Added new files’

🚀 Finally, use the command “git push” to upload the committed changes back to the repository on GitHub. For example: “git push origin main” or “git push origin master,” depending on the branch name.


10. Conclusion
Congratulations! You’ve completed Day 9 of the #90DaysOfDevOps challenge. In this blog post, we covered essential steps in utilizing Git and GitHub for version control. After creating a repository on GitHub and connecting it to the local repository, we successfully added a new file and pushed changes to GitHub. We delved into the significance of Git as a version control system and explained the difference between the main and master branches. Additionally, we clarified the dissimilarity between Git and GitHub, emphasizing their respective roles. Understanding the difference between local and remote repositories, we seamlessly connected them to facilitate efficient collaboration. With these insights, you can now confidently manage your projects with Git and GitHub, enhancing your development journey. 🚀💻